Login to MetaMask: A Comprehensive Guide to Managing Ethereum, Tokens, and NFTs
MetaMask is one of the most widely used cryptocurrency wallets, enabling users to interact with the Ethereum blockchain and other Ethereum-compatible networks. It serves as a bridge to decentralized applications (dApps), decentralized finance (DeFi) protocols, and non-fungible token (NFT) marketplaces. This guide provides a detailed, step-by-step approach to logging in to MetaMask, managing Ethereum (ETH), ERC-20 tokens, and NFTs, and securing your wallet for safe interactions with Web3. Whether you're a beginner or an experienced crypto user, this guide will walk you through the process with clarity and precision.
Table of Contents
-
Introduction to MetaMask
-
What is MetaMask?
-
Why Use MetaMask?
-
Installing MetaMask
-
Downloading MetaMask for Browsers
-
Installing MetaMask on Mobile Devices
-
-
Setting Up a MetaMask Wallet
-
Creating a New Wallet
-
Importing an Existing Wallet
-
-
Logging In to MetaMask
-
Logging In via Browser Extension
-
Logging In via Mobile App
-
Troubleshooting Login Issues
-
-
Managing Ethereum in MetaMask
-
Adding Ethereum to Your Wallet
-
Sending and Receiving Ethereum
-
Understanding Gas Fees
-
-
Managing Tokens in MetaMask
-
Adding ERC-20 Tokens
-
Swapping Tokens
-
Managing Custom Tokens
-
-
Managing NFTs in MetaMask
-
Adding NFTs to Your Wallet
-
Viewing and Interacting with NFTs
-
Minting and Trading NFTs
-
-
Connecting MetaMask to dApps
-
How to Connect to Decentralized Applications
-
Popular dApps to Explore
-
-
Security Best Practices for MetaMask
-
Protecting Your Secret Recovery Phrase
-
Avoiding Phishing Attacks
-
Using Hardware Wallets
-
Enabling Two-Factor Authentication (2FA)
-
-
Advanced Features of MetaMask
-
Custom Gas Settings
-
Adding Custom Networks
-
Using MetaMask Snaps
-
-
Frequently Asked Questions
-
Conclusion
1. Introduction to MetaMask
MetaMask has become a cornerstone of the Web3 ecosystem, with over 100 million users worldwide. It is a free, open-source cryptocurrency wallet that allows users to store, send, and receive Ethereum (ETH), ERC-20 tokens, and NFTs. Available as a browser extension and a mobile app, MetaMask simplifies interactions with the Ethereum blockchain, making it accessible for both beginners and seasoned crypto enthusiasts. This guide will cover how to log in to MetaMask, manage your digital assets, and ensure your wallet remains secure.
2. What is MetaMask?
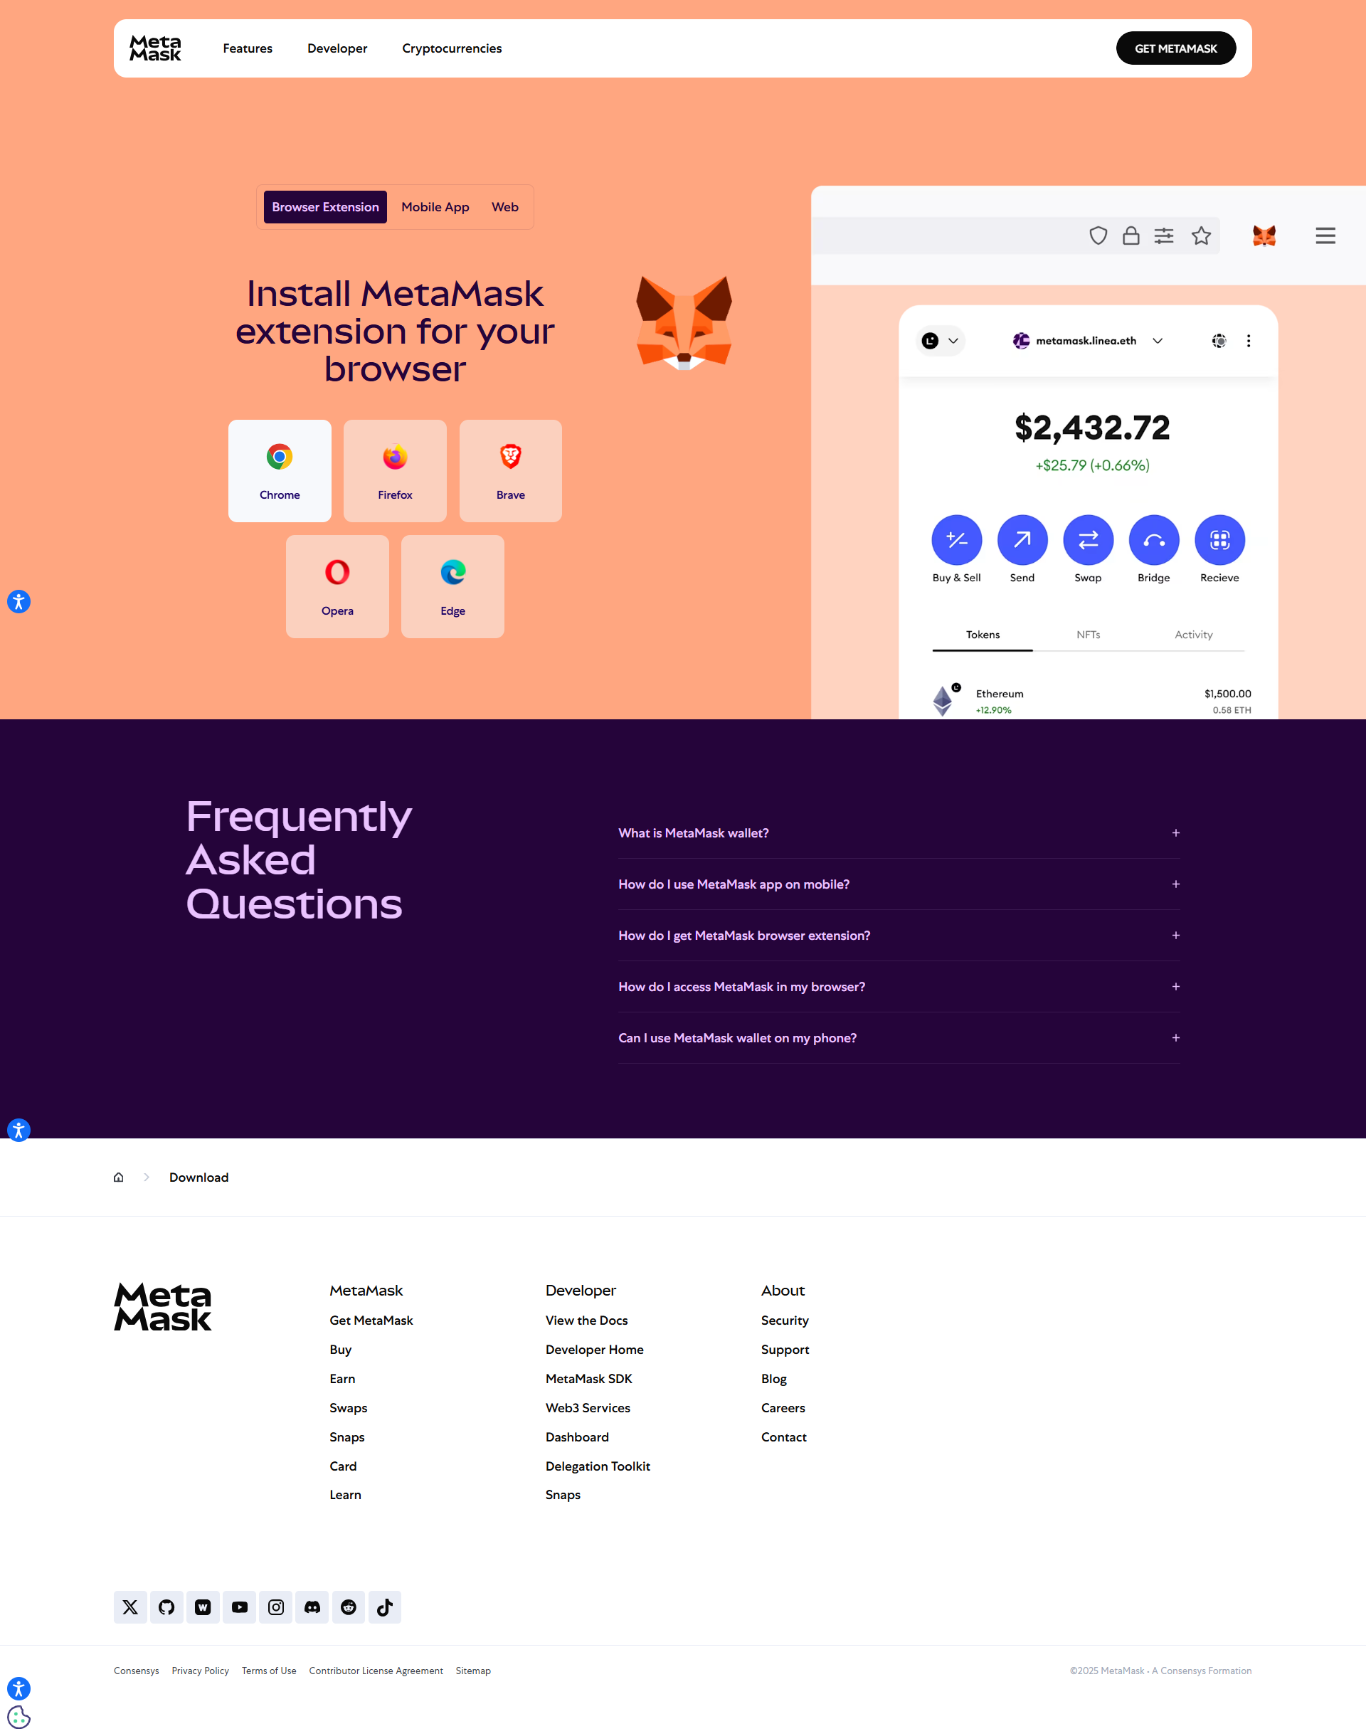
MetaMask is a software wallet that functions as a browser extension (compatible with Chrome, Firefox, Brave, and Edge) and a mobile app (available on iOS and Android). It enables users to:
-
Store and manage Ethereum and ERC-20 tokens.
-
Collect, view, and trade NFTs.
-
Interact with decentralized applications (dApps) like Uniswap, OpenSea, and Aave.
-
Connect to Ethereum-compatible networks, such as Polygon, BNB Chain, and Arbitrum.
-
Securely manage private keys and sign transactions.
MetaMask acts as a gateway to Web3, allowing users to maintain control over their digital identities and assets without relying on centralized intermediaries.
3. Why Use MetaMask?
MetaMask offers several advantages:
-
User-Friendly Interface: Its intuitive design makes it easy for beginners to navigate.
-
Cross-Platform Compatibility: Available on multiple browsers and mobile devices.
-
Decentralized Access: Users retain full control over their private keys and funds.
-
Wide dApp Support: Connects seamlessly with thousands of Ethereum-based dApps.
-
Security Features: Includes transaction simulations, MEV protection, and integration with hardware wallets.
-
Multilingual Support: Available in multiple languages for global accessibility.
Whether you're trading tokens, collecting NFTs, or exploring DeFi, MetaMask is a versatile tool for managing your Web3 journey.
4. Installing MetaMask
Downloading MetaMask for Browsers
To use MetaMask on a desktop, install it as a browser extension:
-
Visit the Official Website: Go to metamask.io using your preferred browser (Chrome, Firefox, Brave, or Edge). Avoid unofficial sources to prevent downloading fake extensions that could compromise your funds.
-
Click "Download": On the homepage, click the "Download" button and select your browser.
-
Add to Browser: You’ll be redirected to the browser’s extension store (e.g., Chrome Web Store). Click “Add to Chrome” (or equivalent) and confirm by selecting “Add Extension.”
-
Confirm Installation: Once installed, the MetaMask fox icon will appear in your browser’s toolbar or under the extensions menu (puzzle icon in Chrome).
-
Pin the Extension: For easy access, pin the MetaMask icon to your toolbar by clicking the puzzle icon, finding MetaMask, and clicking the pin button.
Installing MetaMask on Mobile Devices
To use MetaMask on your phone:
-
Go to the App Store: Open the App Store (iOS) or Google Play Store (Android).
-
Search for MetaMask: Type “MetaMask” in the search bar and select the official app by ConsenSys.
-
Install the App: Tap “Get” or “Install” to download the app.
-
Open the App: Once installed, open MetaMask to begin the setup process.
5. Setting Up a MetaMask Wallet
Creating a New Wallet
To create a new MetaMask wallet:
-
Open MetaMask: Click the MetaMask icon in your browser or open the mobile app.
-
Click "Get Started": Select “Create a Wallet.”
-
Set a Strong Password: Choose a password with at least 8 characters. This password unlocks your wallet on the device. Ensure it’s unique and not used elsewhere.
-
Back Up Your Secret Recovery Phrase (SRP): MetaMask will generate a 12-word Secret Recovery Phrase. Write it down on paper and store it in a secure, offline location. Never store it digitally (e.g., in screenshots or cloud storage). This phrase is the master key to your wallet and funds.
-
Confirm the SRP: MetaMask will ask you to re-enter the 12 words in the correct order to verify you’ve saved them correctly.
-
Complete Setup: Agree to the terms of service and click “Confirm.” Your wallet is now created and ready to use.
Importing an Existing Wallet
If you already have a MetaMask wallet or another Ethereum-compatible wallet:
-
Open MetaMask: Click the MetaMask icon or open the app.
-
Select "Import Wallet": Choose this option instead of creating a new wallet.
-
Enter Your SRP or Private Key: Input your 12-word Secret Recovery Phrase or private key. The SRP is preferred for security.
-
Set a Password: Create a new password for the device.
-
Confirm Import: Once verified, your wallet and its assets will appear in MetaMask.
6. Logging In to MetaMask
Logging In via Browser Extension
-
Open the Extension: Click the MetaMask fox icon in your browser’s toolbar.
-
Enter Your Password: Input the password you set during wallet creation or import.
-
Access Your Wallet: Once authenticated, you’ll see your wallet’s dashboard, displaying your Ethereum balance and account details.
Logging In via Mobile App
-
Open the MetaMask App: Launch the app on your iOS or Android device.
-
Enter Your Password: Input your wallet password.
-
Access Your Wallet: You’ll be taken to the wallet interface, where you can view and manage your assets.
Troubleshooting Login Issues
-
Forgot Password: If you forget your password but have your Secret Recovery Phrase:
-
Click “Forgot Password” in the login screen.
-
Enter your 12-word SRP.
-
Create a new password to regain access.
-
-
Unexpected Logouts: If MetaMask logs you out unexpectedly, re-enter your password. This may occur due to browser updates or crashes.
-
Extension Conflicts: Other browser extensions may interfere with MetaMask. Disable other extensions one by one to identify conflicts.
-
Connection Issues: If MetaMask isn’t connecting to the Ethereum blockchain, check your internet connection or switch networks (e.g., from Ethereum Mainnet to a testnet).
7. Managing Ethereum in MetaMask
Adding Ethereum to Your Wallet
To use MetaMask, you need ETH to pay for gas fees and interact with dApps. Here’s how to add ETH:
-
Buy ETH Directly:
-
In MetaMask, click “Buy” in the wallet interface.
-
Select a payment method (e.g., credit/debit card, PayPal, or bank transfer) via providers like Wyre or CoinSwitch.
-
Enter the amount and follow the prompts to complete the purchase. Note that available methods depend on your region.
-
-
Transfer ETH from Another Wallet or Exchange:
-
Copy your MetaMask public address (found under your account name in the wallet).
-
Log in to your exchange (e.g., Coinbase, Binance) or another wallet.
-
Send ETH to your MetaMask address. Ensure you select the Ethereum network for the transfer.
-
Sending and Receiving Ethereum
-
Receiving ETH:
-
Copy your MetaMask public address.
-
Share it with the sender or use it to transfer funds from another wallet or exchange.
-
Funds will appear in your MetaMask wallet once the transaction is confirmed on the blockchain.
-
-
Sending ETH:
-
Open MetaMask and click “Send.”
-
Paste the recipient’s Ethereum address.
-
Enter the amount of ETH to send and set the gas fee (see below for details).
-
Confirm the transaction. Wait for it to move from “Pending” to “Confirmed.”
-
Understanding Gas Fees
Every Ethereum transaction requires a gas fee, paid in ETH, to compensate miners or validators for processing it. Gas fees vary based on network congestion:
-
Setting Gas Fees: MetaMask offers three gas fee options (Low, Medium, High). You can also customize gas settings for advanced control.
-
Tips for Lower Fees:
-
Use MetaMask’s “Custom Gas Settings” to set a lower gas price (GWEI) during low network activity.
-
Monitor gas trackers like Etherscan Gas Tracker to time your transactions.
-
8. Managing Tokens in MetaMask
Adding ERC-20 Tokens
MetaMask supports ERC-20 tokens, which are standard tokens on the Ethereum blockchain (e.g., USDC, LINK, USDT). To add a token:
-
Open MetaMask: Go to the “Assets” tab.
-
Click "Import Tokens": Select “Custom Token.”
-
Enter Token Details:
-
Contract Address: Find the token’s contract address on sites like Etherscan or CoinGecko.
-
Paste the address, and MetaMask will auto-fill the token symbol and decimals.
-
-
Confirm: The token will appear in your wallet if you hold any.
Swapping Tokens
MetaMask’s built-in swap feature allows you to exchange tokens without leaving the wallet:
-
Go to the Swap Section: Click “Swap” in the MetaMask interface.
-
Select Tokens: Choose the token you want to swap and the desired output token.
-
Enter Amount: Specify how much you want to swap.
-
Review and Confirm: MetaMask will display quotes from providers. Confirm the transaction and pay the gas fee.
Managing Custom Tokens
For tokens not listed in MetaMask’s default token list:
-
Manually add them using the contract address, as described above.
-
Regularly review your token list and remove unused tokens to keep your wallet organized.
9. Managing NFTs in MetaMask
Adding NFTs to Your Wallet
MetaMask supports ERC-721 and ERC-1155 NFTs:
-
Automatic Detection: If you purchase or receive an NFT on a supported marketplace (e.g., OpenSea), it may appear automatically in the “NFTs” tab.
-
Manual Addition:
-
Go to the “NFTs” tab and click “Import NFT.”
-
Enter the NFT’s contract address and token ID (available from the marketplace or blockchain explorer).
-
Confirm to add the NFT to your wallet.
-
Viewing and Interacting with NFTs
-
Viewing NFTs: In the MetaMask mobile app or browser extension, go to the “NFTs” tab to see your collection, including metadata like images and descriptions.
-
Interacting with NFTs: Connect MetaMask to NFT marketplaces (e.g., OpenSea, Rarible) to buy, sell, or trade NFTs.
Minting and Trading NFTs
-
Minting NFTs: Use dApps like Rarible or Mintable to create (mint) NFTs. Connect MetaMask, upload your artwork, and pay the gas fee to mint.
-
Trading NFTs: Visit NFT marketplaces, connect your MetaMask wallet, and list your NFTs for sale or bid on others. Ensure you have enough ETH for gas fees.
10. Connecting MetaMask to dApps
How to Connect to Decentralized Applications
-
Visit a dApp: Go to a dApp’s website (e.g., Uniswap, OpenSea).
-
Click "Connect Wallet": Most dApps have a “Connect” button in the top-right corner.
-
Select MetaMask: Choose MetaMask from the list of wallet options.
-
Approve Connection: MetaMask will prompt you to approve the connection. Confirm to link your wallet to the dApp.
-
Sign Transactions: When interacting with the dApp (e.g., swapping tokens or buying NFTs), MetaMask will prompt you to sign transactions. Review details carefully before confirming.
Popular dApps to Explore
-
Uniswap: A decentralized exchange for swapping tokens.
-
OpenSea: The largest NFT marketplace for buying and selling digital collectibles.
-
Aave: A DeFi protocol for lending and borrowing crypto.
-
Compound: A platform for earning interest on crypto deposits.
11. Security Best Practices for MetaMask
Protecting Your Secret Recovery Phrase
-
Store Offline: Write your 12-word SRP on paper and store it in a secure location (e.g., a safe). Never store it digitally.
-
Never Share: MetaMask will never ask for your SRP. Avoid sharing it with anyone, including websites or support teams.
-
Use a Password Manager: For added security, store your SRP in a reputable password manager like KeePass, but ensure it’s encrypted.
Avoiding Phishing Attacks
-
Verify URLs: Always access MetaMask via metamask.io or the official app. Beware of fake websites mimicking MetaMask.
-
Ignore Suspicious Requests: Scammers may send emails or messages asking for your SRP or password. Ignore and report them.
-
Use Wallet Guard: MetaMask integrates Wallet Guard to detect malicious contracts and scams. Ensure this feature is enabled.
Using Hardware Wallets
For enhanced security, especially for large holdings:
-
Connect MetaMask to a hardware wallet like Ledger or Trezor.
-
In MetaMask, go to “Add Account or Hardware Wallet” and select your device.
-
This keeps your private keys offline, reducing the risk of hacks.
Enabling Two-Factor Authentication (2FA)
While MetaMask doesn’t natively support 2FA, enable it on related accounts (e.g., email or exchanges linked to MetaMask) for added security. Use authenticator apps like Google Authenticator or Authy.
12. Advanced Features of MetaMask
Custom Gas Settings
To optimize transaction costs:
-
In the transaction confirmation screen, click “Edit” next to the gas fee.
-
Adjust the gas price (GWEI) and gas limit based on network conditions.
-
Use tools like Etherscan to find optimal gas settings.
Adding Custom Networks
MetaMask supports Ethereum-compatible networks like Polygon or BNB Chain:
-
Open Networks Menu: Click the network dropdown (default: Ethereum Mainnet).
-
Select "Add Network": Choose “Custom Network.”
-
Enter Network Details:
-
Network Name (e.g., Polygon)
-
RPC URL (available from the network’s official site)
-
Chain ID
-
Currency Symbol
-
-
Save and Switch: The network will appear in your dropdown menu.
Using MetaMask Snaps
MetaMask Snaps are plugins that extend wallet functionality:
-
Install Snaps from trusted sources via the MetaMask interface.
-
Use Snaps to add support for non-EVM blockchains or advanced features like enhanced security checks.
13. Frequently Asked Questions
Q: Is MetaMask free to use?
A: Yes, MetaMask is free, but you’ll need ETH to pay gas fees for transactions.
Q: Can I use MetaMask on multiple devices?
A: Yes, import your wallet using your Secret Recovery Phrase on each device. Ensure the SRP is secure.
Q: What happens if I lose my Secret Recovery Phrase?
A: Without your SRP, you cannot recover your wallet if you lose access. Always back it up securely. If logged in, you can view your SRP in Settings > Security & Privacy > Reveal Secret Recovery Phrase.
Q: Does MetaMask support Bitcoin?
A: No, MetaMask does not natively support Bitcoin. It is primarily for Ethereum and EVM-compatible networks.
Q: How do I withdraw fiat from MetaMask?
A: Sell crypto for fiat via MetaMask’s “Sell” feature (if available in your region) or transfer to an exchange like Coinbase, then withdraw to your bank.
14. Conclusion
MetaMask is an essential tool for navigating the Ethereum blockchain and the broader Web3 ecosystem. By following this guide, you can confidently log in to MetaMask, manage Ethereum, tokens, and NFTs, and secure your wallet against potential threats. From setting up your wallet to connecting with dApps and exploring advanced features, MetaMask offers a powerful yet user-friendly platform for engaging with decentralized finance, NFTs, and more. Always prioritize security by safeguarding your Secret Recovery Phrase and staying vigilant against phishing attacks. With MetaMask, you’re equipped to explore the decentralized future with ease and confidence.

